Set up a Next.js app with Prisma ORM and Kinde Auth
By Vlad Ionash —
This guide provides detailed steps on how to seamlessly integrate Kinde, a robust authentication system, with Prisma ORM in a Next.js application. It covers the process of setting up Prisma, defining user models, and updating user data during authentication using the Kinde Next.js App Router SDK. The goal is to create a robust and secure user management system leveraging the power of Kinde and Prisma ORM.
Let’s create it!
- Setting up a Kinde account
- Launching a Next.js Kinde starter kit which handles user authentication
- Saving user data to a local Sqlite3 database with Prisma ORM
- A Kinde account
- A running Next.js application that uses Kinde OR the Kinde Next.js starter kit
-
Sign in to your Kinde account.
-
Go to Settings > Applications.
-
If you haven’t added your application to Kinde yet:
- Select Add application. A dialog opens.
- Enter a name for the app.
- Select the Back-end web application type. You need to do this if you’re using the Next.js starter kit. Note that front-end apps do not provide a client secret which is needed for this to work.
- Select Save.
-
If you have already created your app, select View details on the relevant application.
-
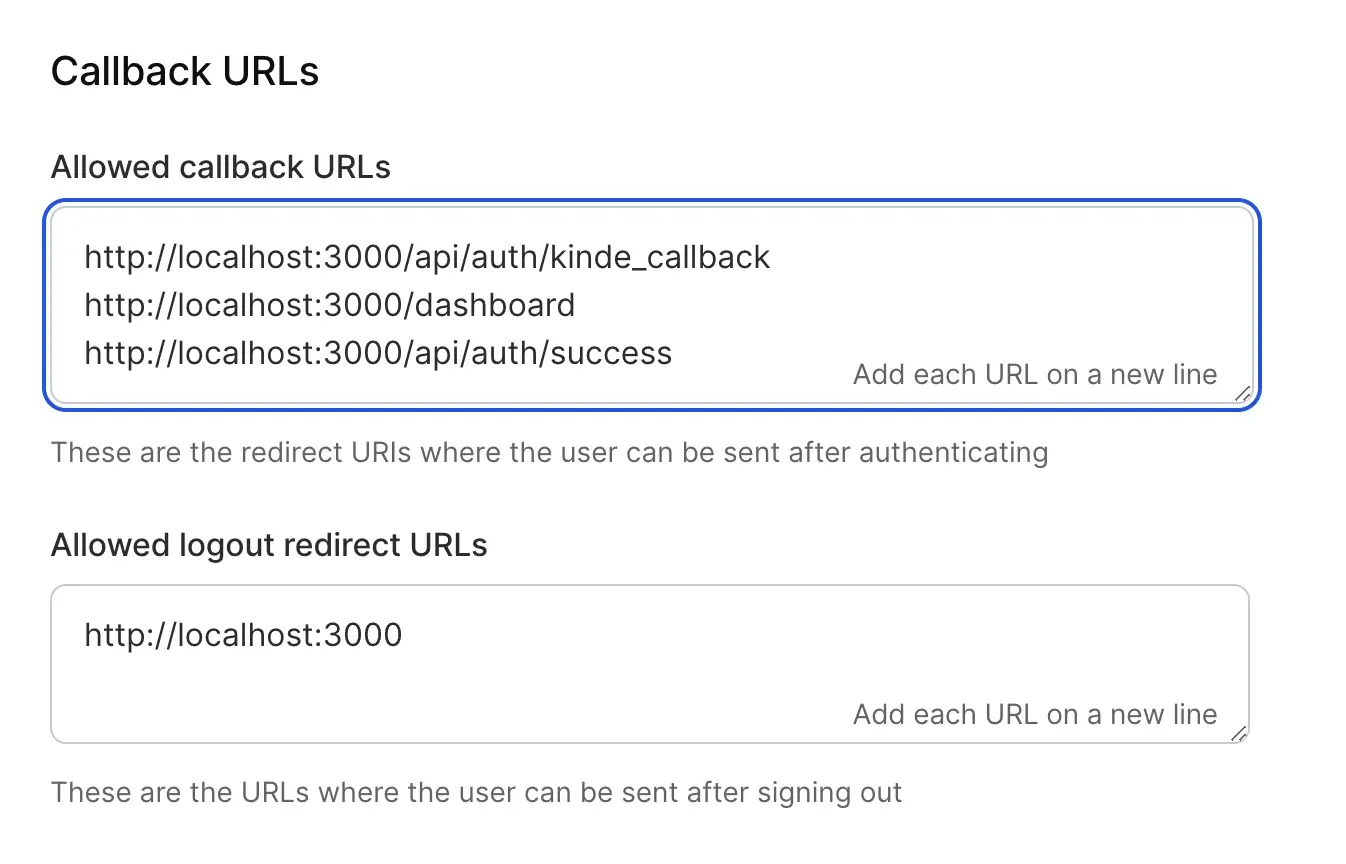
Update the callback and logout redirect URLs as you see fit.
To get the starter kit to work, add the following to the allowed callback URLs:
http://localhost:3000/api/auth/kinde_callbackhttp://localhost:3000/dashboard
And the following to the logout redirect URLs:
http://localhost:3000
-
Select Save.
-
Go to the Authentication page.
-
Choose the Authentication connections you want to use.
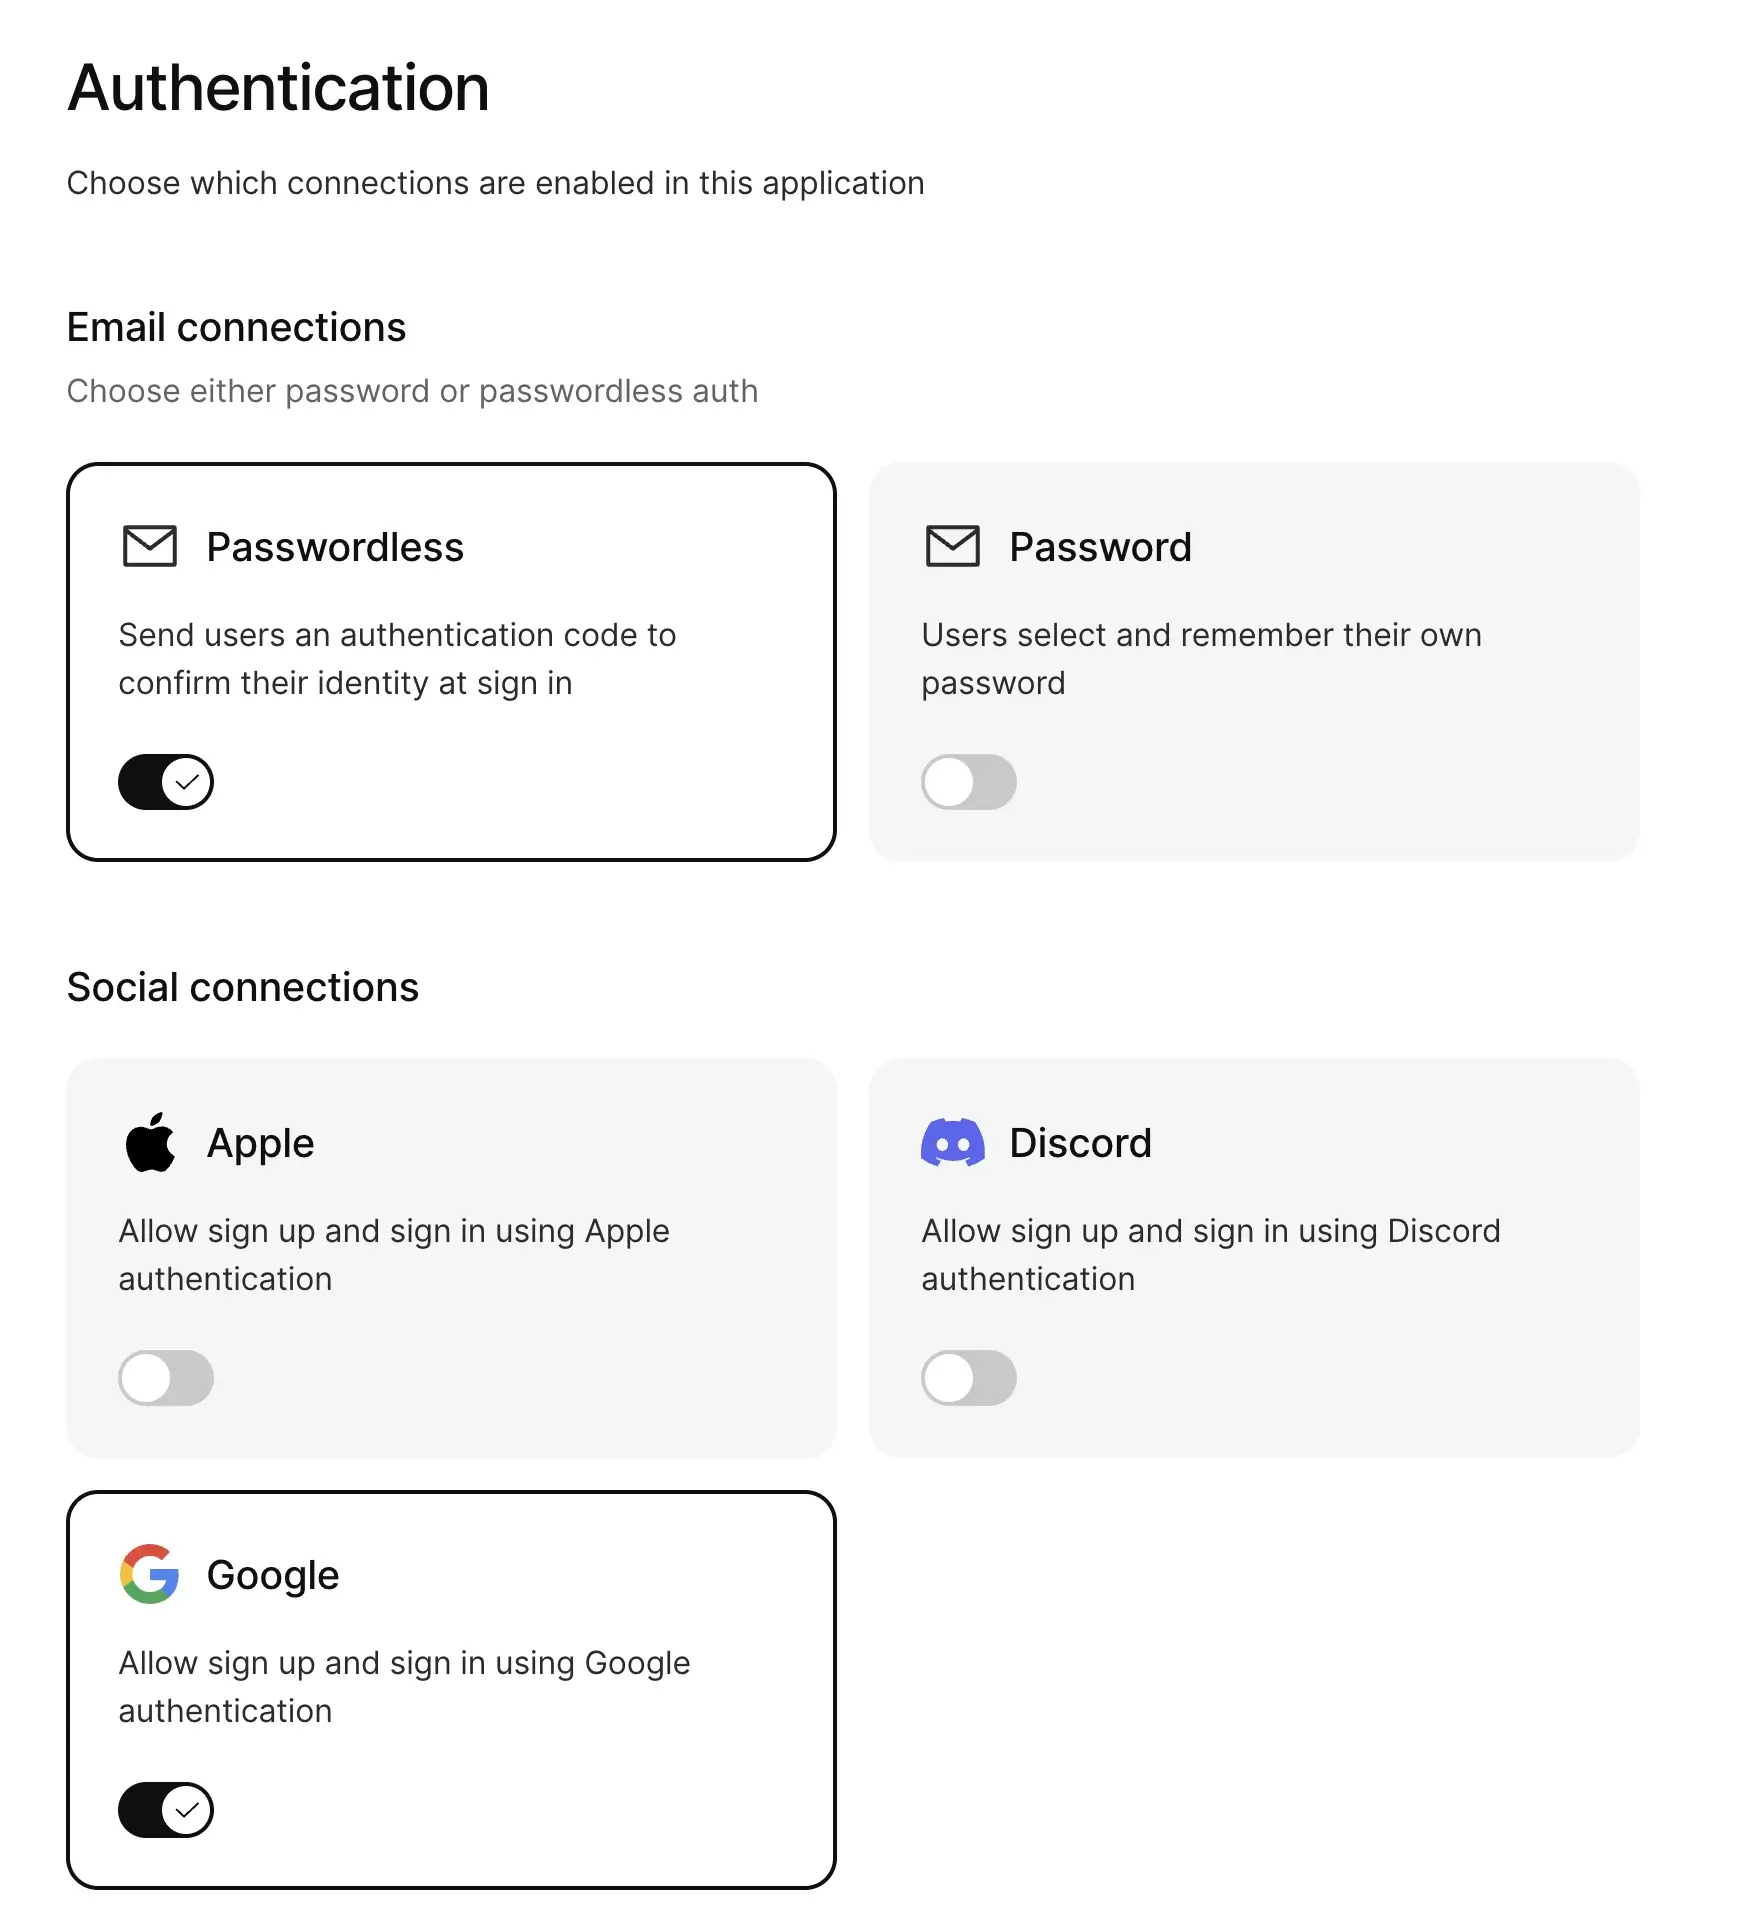
- Select Save.
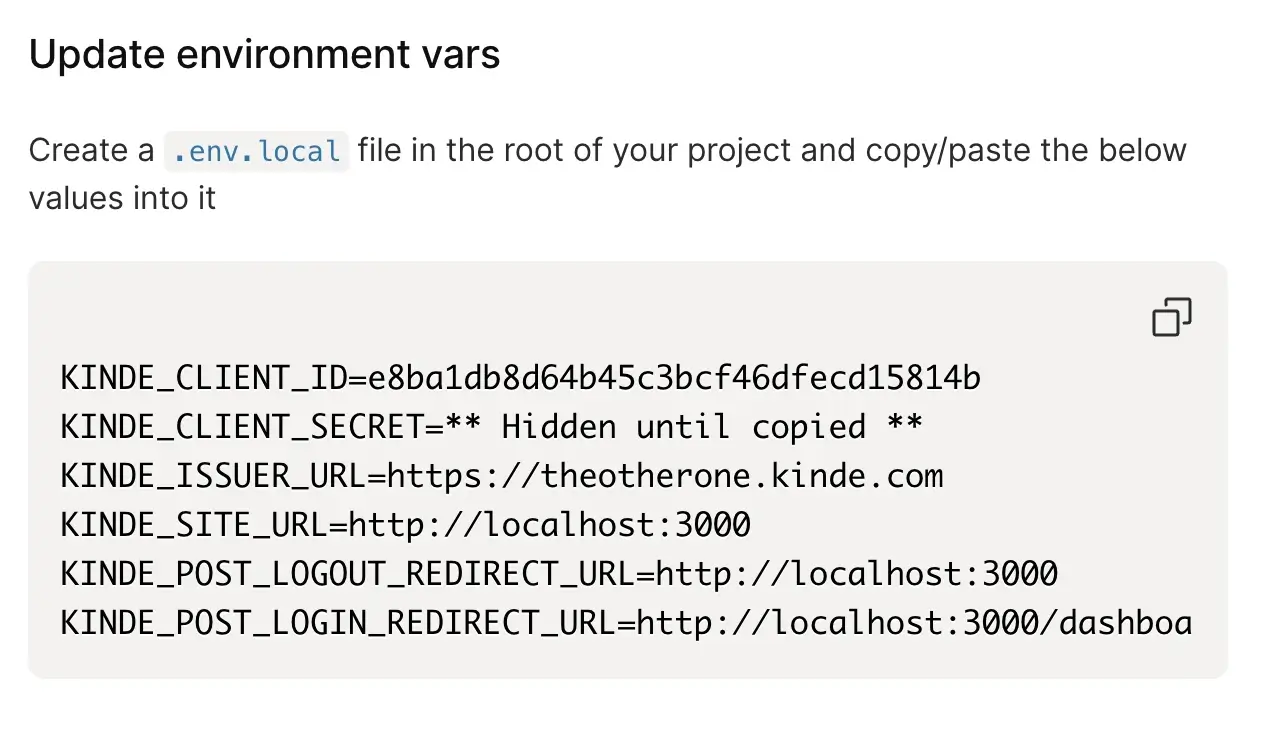
- Go to the Quick start page.
- Copy the contents of the Update environment vars. We will need this later.
The Next.js starter kit provides a functional app that we can use for demo purposes. The starter kit functions like a typical Next.js project, allowing you to add an ORM layer directly. If you are bringing your own app, you can skip to the Prisma ORM Integration step.
-
Clone and launch the Next.js Starter Kit in your favorite IDE.
-
Go to the
.env.local.sampleand rename it to.env.localor just.env. -
Replace the contents of the file with contents that you copied from the Update environment vars section.
💡 After the completion of this step, it should now be possible to successfully run the starter kit. You can test this by navigating to
http://localhost:3000and going through the sign-up flow.
-
Install Prisma along with the Prisma client and initialize the repo as a development dependency.
At the root of your directory, run:
npm install prisma --save-dev
npm install @prisma/client
npx prisma init
This:
- installs the Prisma client which you can use to interact with the Prisma database.
- creates a
prismadirectory with aschema.prismafile. - updates our
.envfile with aDATABASE_URLsection.
-
Configure Prisma to use SQLite and define the User model.
Copy and paste the following contents into your prisma/schema.prisma file, overriding what is in there.
generator client {
  provider = "prisma-client-js"
  // binaryTargets = ["native", "rhel-openssl-1.0.x"] // Optional for more verbose logs
  // log    = ["query", "info", "warn", "error"]
}

datasource db {
  provider = "sqlite"
	url      = env("DATABASE_URL")
}

model User {
  id        Int      @id @default(autoincrement())
  kindeId   String   @unique
  email     String   @unique
  firstName String
  lastName  String
}
We use SQLite for this example so we can run the database locally. We keep track of the id,kindeId, email, firstName, and lastName of our authenticated users for reference. These are going to be mapped to Kinde’s nomenclature in the next steps to associate them.
-
Generate the Prisma Client.
To construct the actual database that is based on our schema, run the following command:
npx prisma generateEvery time you update the
prisma/schema.prismafile, run this command again to propagate the changes and update the Prisma database. -
Create a user model after successful authentication.
This involves creating a new route that grabs the information for our database after a successful authentication. Let’s use:
http://localhost:3000/api/auth/success.Create the file
src/app/api/auth/success/route.tsand post the following code in it:import {PrismaClient} from "@prisma/client"; import {getKindeServerSession} from "@kinde-oss/kinde-auth-nextjs/server"; import {NextResponse} from "next/server"; const prisma = new PrismaClient(); export async function GET() { const {getUser} = getKindeServerSession(); const user = await getUser(); if (!user || user == null || !user.id) throw new Error("something went wrong with authentication" + user); let dbUser = await prisma.user.findUnique({ where: {kindeId: user.id} }); if (!dbUser) { dbUser = await prisma.user.create({ data: { kindeId: user.id, firstName: user.given_name ?? "", lastName: user.family_name ?? "", email: user.email ?? "" // Using nullish coalescing operator to provide a default empty string value } }); } return NextResponse.redirect("http://localhost:3000/dashboard"); }In this code, we’re running checks on if the user is valid and if the user exists. If the user is valid and the user does not already exist in our database, we create a database entry with the defined data we specified in the
prisma/schema.prismafile. It then routes to our dashboard view, mimicking the original Next.js starter kit implementation.Notice that we are grabbing the information from the
getUserconstant and mapping it to the associated variable. You can grab a variety of information from other constants as well including:getAccessToken, getBooleanFlag, getFlag, getIdToken, getIntegerFlag, getOrganization, getPermission, getPermissions, getStringFlag, getUser, getUserOrganizations, isAuthenticated -
Update the
.envfile with new parameters.Navigate back to the
.envfile and overwrite the following specific lines with:KINDE_POST_LOGIN_REDIRECT_URL=http://localhost:3000/api/auth/successDATABASE_URL=”file:./dev.db”
This routes our app to the newly created route after a successful login, which creates our database record and redirects to the dashboard.
The database url is then updated to source a local file for Prisma, as we are using a SQLite db which lives in the
Prismafolder. -
Update the Callback URLs section in the Kinde portal by adding
http://localhost:3000/api/auth/successto it.
-
Start your application.
npm run devYour application should now be running at
http://localhost:3000. -
Register a new user.
Navigate to
http://localhost:3000in your web browser and select Sign up. Register a new user by providing an email address and password, or using one of the auth connections that you configured in your Kinde app. -
Check the database.
After the registration process, check the SQLite database to see if the user has been created. You can use a SQLite database viewer for this, or you can use Prisma’s own studio tool which provides a GUI for your database. Run the following command to open Prisma Studio:
npx prisma studioThis opens up a new browser window (defaults to
http://localhost:5555) with a visual interface for your database. Click theUsermodel in the sidebar to view a list of all users. The user you just registered should be in this list.
The email address of the user you just registered should match the email address in the database.
If you see the user you just registered in the database, it means that the integration of Prisma in your application was successful!
⚠️ Remember to handle any errors and close the Prisma client when your server shuts down to avoid any potential memory leaks. You can do this by listening for the
SIGINTandSIGTERMsignals in your server and callingprisma.$disconnect().
By following these steps, you now have an application with a robust, full-stack user management system, capable of handling both authentication with Kinde and user data persistence with Prisma. This setup leverages the strengths of both platforms: Kinde’s simplicity in authentication processes and Prisma’s power in database management.
Remember to observe good security practices in handling user data and credentials. Regularly update your dependencies and monitor your application for any security advisories.
If you need any assistance with getting Kinde connected reach out to support@kinde.com.
You can also join the Kinde community on Slack or the Kinde community on Discord for support and advice from the team and others working with Kinde.