Kinde with Convex: Webhooks to real-time data
By Vlad Ionash —
Convex emerges as a formidable real-time Backend-as-a-Service provider, simplifying the creation of dynamic, interactive experiences, especially within the React ecosystem.
Kinde Auth now boasts premier integration capabilities with Convex with the release of webhooks. Through this integration, the queries and mutations housed in your Convex setup can be authenticated using tokens generated by Kinde Auth.
Integrating multiple data sources into a single application can present numerous challenges. While Kinde Auth’s Backend APIs serve many use cases efficiently, leveraging Webhooks can elevate integration, offering a seamless flow within your existing tech stack. This guide will outline the procedure to sync user data from Kinde Auth into a Convex database utilizing Webhooks.
When creating apps, a problem arises with keeping your backend in sync with the frontend. A refresh of the JWT token or user authentication would be fine for things such as one-time transactions or privilege increases, but falls flat in the user experience when we extend it to things such as icons representing a user’s status (ie. having a green chat bubble vs yellow). Imagine if we had to refresh the webpage or have the user do a full authentication procedure just to update a profile photo.
We need users to register via Kinde and sync it actively with the backend. A Convex database query can dynamically search for the user’s details, but if the user’s information is not yet recorded in the database post-signup, the system fails to recognize the user. This disconnect stems from the initial absence of the user’s data in the Convex database immediately after the signup process, posing a significant barrier to seamless access and interaction within the chat room environment.
This gap is bridged using webhooks. Following a user’s registration via Kinde, Kinde dispatches an HTTP request filled with signup details to a specified URL. This URL is linked to a Convex HTTP Action, which processes the received data and accordingly creates a user record within the Convex database. Consequently, when the client next queries for the user’s details, it fetches the accurate response, thanks to the newly added record.
Furthermore, because Convex queries are designed to be reactive, there’s no necessity for the client to repeat the query. Instead, an automatic server update regarding the user information is sent to the client. This update triggers a React component to refresh the UI, smoothly ushering the user into the chat room environment.
The Convex + Kinde Auth starter repository serves as a practical example. You’re encouraged to clone this repository, setting it up locally by adhering to the given instructions.
You can find the demo repo here: https://github.com/umuthopeyildirim/react-kinde-convex, full credit to umuthopeyildirim for his nice work on a starter kit!
This guide will:
- Assume you have worked with Convex before.
- Delve into how the demonstration leverages data sync alongside reactive queries.
- Give an overview on how implementation will work!
This will assume you have a working application already set-up with Kinde. Navigate to your application that you want to customize and do the following:
-
Navigate to Settings → Webhooks on the sidebar.
-
Click on Add Webhook.
-
Setup the Webhook.
Here we will define the information that we need. Add any Name and Description that will help you differentiate this from other ones that you have setup.
The Endpoint URL will be defined with the application that you want to integrate with. A good way to test this out would be to use something like https://webhook.site/. They will provide you a URL that you can hit which you can see the body response to, to see if it is working.
Events can be configured as needed. For this, I’ll be adding all the events.
⚠️ Be wary of limitations on external providers. A lot of third-party integration services are restricted with how many queries they can parse or charge you per instance that the Webhook is hit. If you are restricted by this, make sure to only toggle the events that are needed to avoid charges
After this is configured, let’s test with https://webhook.site/. Go to an application that is tied to your Organization that the Webhook is setup with, and perform an event action such as a sign-up or sign-in.
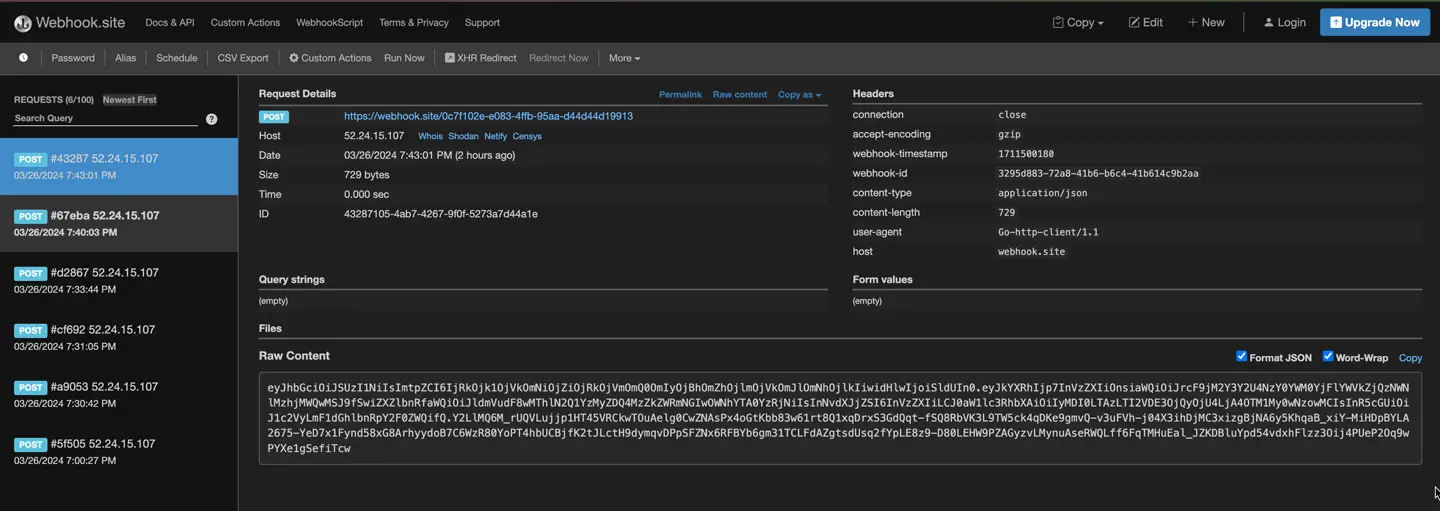
Your response should look something like the above.
Notice how the response looks something like a string of random characters in the body:
eyJhbGciOiJSUzI1NiIsImtpZCI6IjRkOjk1OjVkOmNiOjZiOjRkOjVmOmQ0OmIyOjBhOmZhOjlmOjVkOmJlOmNhOjlkIiwidHlwIjoiSldUIn0.eyJkYXRhIjp7InVzZXIiOnsiaWQiOiJrcF9jM2Y3Y2U4NzY0YWM0YjFlYWVkZjQzNWNlMzhjMWQwMSJ9fSwiZXZlbnRfaWQiOiJldmVudF8wMThlN2Q1YzMyZDQ4MzZkZWRmNGIwOWNhYTA0YzRjNiIsInNvdXJjZSI6InVzZXIiLCJ0aW1lc3RhbXAiOiIyMDI0LTAzLTI2VDE3OjQyOjU4LjA4OTM1My0wNzowMCIsInR5cGUiOiJ1c2VyLmF1dGhlbnRpY2F0ZWQifQ.Y2LlMQ6M_rUQVLujjp1HT45VRCkwTOuAelg0CwZNAsPx4oGtKbb83w61rt8Q1xqDrxS3GdQqt-fSQ8RbVK3L9TW5ck4qDKe9gmvQ-v3uFVh-j04X3ihDjMC3xizgBjNA6y5KhqaB_xiY-MiHDpBYLA2675-YeD7x1Fynd58xG8ArhyydoB7C6WzR80YoPT4hbUCBjfK2tJLctH9dymqvDPpSFZNx6RFBYb6gm31TCLFdAZgtsdUsq2fYpLE8z9-D80LEHW9PZAGyzvLMynuAseRWQLff6FqTMHuEal_JZKDBluYpd54vdxhFlzz3Oij4PUeP2Oq9wPYXe1gSefiTcwThis is because it’s encoded as a JWT. We will need to decode this to get the information that we want.
Something simple that can accomplish this in JS would be:
const jwt = inputData.jwt; // Assuming inputData.jwt is your JWT
const base64Url = jwt.split(".")[1]; // Get the payload part of the token
const base64 = base64Url.replace(/-/g, "+").replace(/_/g, "/");
const payload = JSON.parse(Buffer.from(base64, "base64").toString("ascii"));

output = {decodedPayload: payload};
or you can utilize an online tool here: https://kinde.com/tools/online-jwt-decoder/
The above gives me the header response of:
{
    "alg": "RS256",
    "kid": "4d:95:5d:cb:6b:4d:5f:d4:b2:0a:fa:9f:5d:be:ca:9d",
    "typ": "JWT"
}
With the payload being:
{
    "data": {
        "user": {
            "id": "kp_c3f7ce8764ac4b1eaedf435ce38c1d01"
        }
    },
    "event_id": "event_018e7d5c32d4836dedf4b09caa04c4c6",
    "source": "user",
    "timestamp": "2024-04-26T17:42:58.089353-07:00",
    "type": "user.authenticated"
}
We can create a file that essentially manages and decodes the received webhook. Remember, the webhook does come in a JWT and will need to incorporate a decoder inside of it.
Start by creating the convex/http.ts file within the repository:
// Import necessary modules or libraries

// Function to validate and decode JWT from the incoming request
async function validateRequest(request) {
    // Extract the JWT from the request. Assuming it's in a header named 'Authorization'
    const authHeader = request.headers.get("Authorization");
    if (!authHeader) {
        console.error("No Authorization header present in the request");
        return null;
    }

    const jwt = authHeader.split(" ")[1]; // Assuming the header format is "Bearer <jwt>"
    if (!jwt) {
        console.error("JWT not found in Authorization header");
        return null;
    }

    // Decode the JWT without verifying. This is just an example; in a real scenario, you should verify the JWT!
    const base64Url = jwt.split(".")[1];
    const base64 = base64Url.replace(/-/g, "+").replace(/_/g, "/");
    const payload = JSON.parse(Buffer.from(base64, "base64").toString("ascii"));

    // Here you can add additional validation of the payload if necessary

    return {type: payload.eventType, data: payload}; // Assuming payload contains an eventType to switch on
}

// Defining the webhook handler
const handleKindeWebhook = httpAction(async (ctx, request) => {
    const event = await validateRequest(request);
    if (!event) {
        return new Response("Error occurred", {status: 400});
    }

    switch (event.type) {
        // Processing respective to the event type
        // Example:
        // case 'userCreated':
        //   console.log('Handle userCreated event', event.data);
        //   break;
        default:
            console.log("Unhandled event type:", event.type);
    }
    return new Response(null, {status: 200});
});

// Initializing the HTTP router
const http = httpRouter();

// Configuring the webhook route
http.route({
    path: "/kinde-users-webhook",
    method: "POST",
    handler: handleKindeWebhook
});

// Assuming there's a method to start the server or listen on a port
http.listen(3000, () => console.log("Server running on port 3000"));
The handleKindeWebhook function, incorporating httpAction, processes the HTTP request alongside a context object, facilitating access to additional Convex resources. It performs a security validation to affirm the request’s authenticity and conducts database mutations in alignment with the event received.
From here, we should be able to get registration statuses into your Convex database. You can test this out by having a user log-in, and their information being stored.
We can then query and call the convex database with events, referencing the Convex database:
switch (event.type) {
    case "user.created":
    case "user.updated": {
        await ctx.runMutation(internal.users.updateOrCreateUser, {
            kindeUser: event.data
        });
        break;
    }
    case "user.deleted": {
        const id = event.data.id!;
        await ctx.runMutation(internal.users.deleteUser, {id});
        break;
    }
    default: {
        console.log("ignored Kinde webhook event", event.type);
    }
}
This enables Convex’s most potent capability, Queries, to directly access user data. As a result, the application avoids making extra requests to Kinde for user data retrieval! Additionally, this feature ensures that the user interface is updated in real-time if any data changes occur, such as a modification in the user’s name or profile picture.
export const getUser = internalQuery({
    args: {subject: v.string()},
    async handler(ctx, args) {
        return ctx.db
            .query("users")
            .withIndex("by_kinde_id", (q) => q.eq("KindeUser.id", args.subject))
            .unique();
    }
});
These operations effectively replicate the Kinde user table within the Convex environment, optimizing the power of Convex - facilitating direct access to user data, thus averting the notorious n+1 problem, and ensuring the UI remains responsive to data changes.
Webhooks stand as testament to the robust capabilities of backend integrations, marrying Kinde’s comprehensive user management with the bespoke data handling and processing preferences of your tech stack. They stitch disparate backend components into a cohesive whole, accommodating your data storage and processing methodologies.
Remember, the key to a successful integration lies in careful configuration and testing to ensure seamless authentication flows and secure data access patterns.
Remember to observe good security practices in handling user data and credentials. Regularly update your dependencies and monitor your application for any security advisories.
If you need any assistance with getting Kinde connected reach out to support@kinde.com.
You can also join the Kinde community on Slack or the Kinde community on Discord for support and advice from the team and others working with Kinde.