Kinde’s webhooks feature is live, a significant development for developers and businesses integrating authentication services into their applications.
Webhooks are user-defined HTTP callbacks that are triggered by specific events.
You can trigger a custom action flow in a third party service when certain events take place, such as a registration or profile update.
For instance, sending a custom email response to specific users based on certain criteria during sign-up, or notifying a discord server with a message when a new user is authenticated.
Webhooks enhance your capacity to create more dynamic, responsive, and personalized user experiences.
To showcase the feature, we’ll be building an example where we can track how many users have authenticated in a Discord Server!
We are going to assume that you have a working application that uses Kinde’s auth. If you do not, you can reference and utilize one of the Kinde Starter Kits.
Navigate to Settings → Webhooks on the sidebar.
Click on Add Webhook.
Setup the Webhook.
Here we will define the information that we need. Add any Name and Description that will help you differentiate this from other ones that you have setup.
The Endpoint URL will be defined with the application that you want to integrate with. A good way to test this out would be to use something like https:/ webhook.site/. They will provide you a URL that you can hit which you can see the body response to, to see if it is working. Events can be configured as needed. For this, I’ll be adding all the events.
⚠️ Be wary of limitations on external providers. A lot of third-party integration services are restricted with how many queries they can parse or charge you per instance that the Webhook is hit. If you are restricted by this, make sure to only toggle the events that are needed to avoid charges
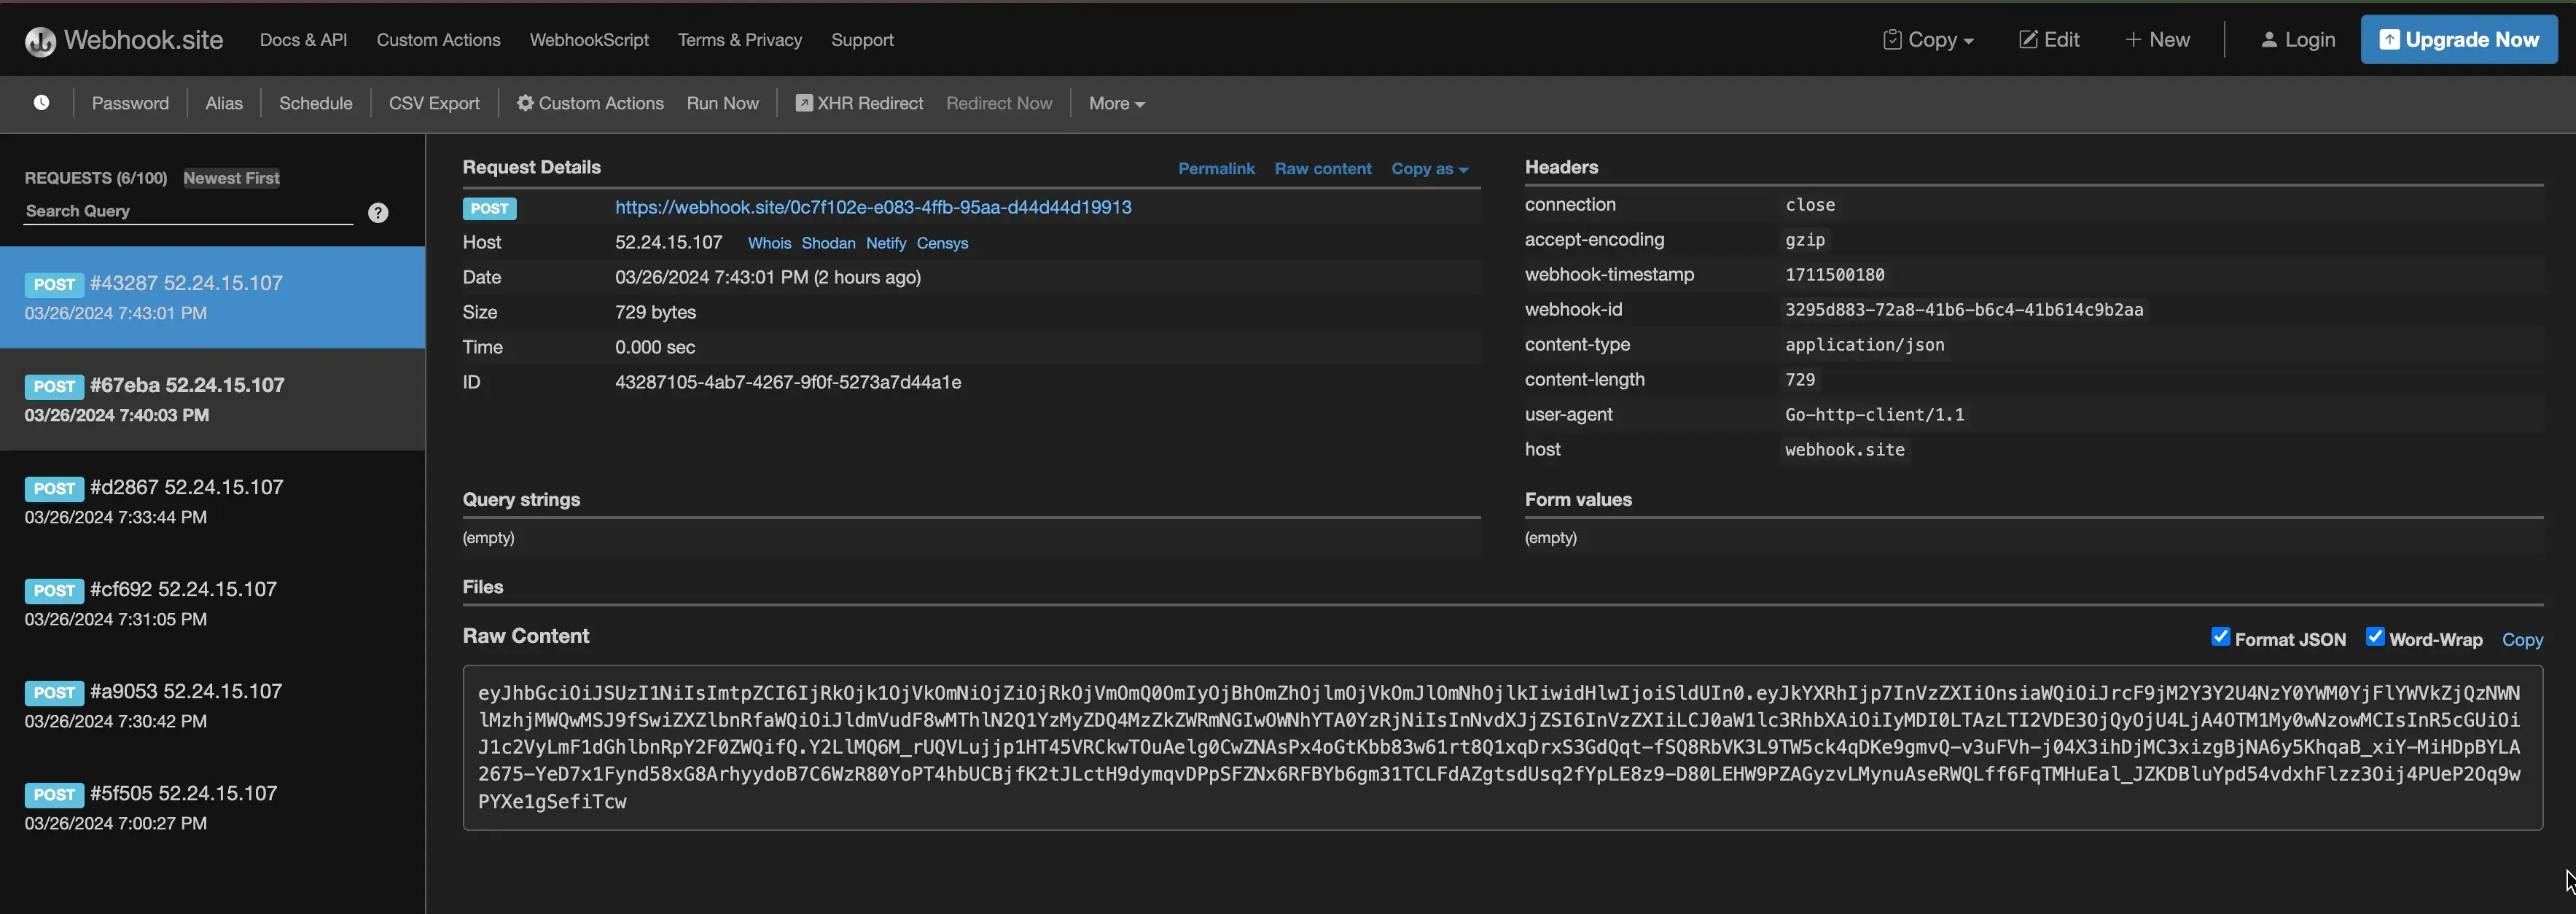
After this is configured, let’s test with https://webhook.site/. Go to an application that is tied to your Organization that the Webhook is setup with, and perform an event action such as a sign-up or sign-in.
Your response should look something like the above.
Notice how the response looks something like a string of random characters in the body:
This is because it’s encoded as a JWT. We will need to decode this to get the information that we want.
Something simple that can accomplish this in JS would be:
const jwt = inputData.jwt;// Assuming inputData.jwt is your JWTconst base64Url = jwt.split(".")[1];// Get the payload part of the tokenconst base64 = base64Url.replace(/-/g,"+").replace(/_/g,"/");const payload =JSON.parse(Buffer.from(base64,"base64").toString("ascii"));
output ={decodedPayload: payload};
For this example, we will be using Zapier to integrate our webhook instance. Be aware you are able to utilize webhooks in a variety of different applications or you can even build your own flows by hosting servers or endpoints that can be hit publicly, such as ngrok instances.
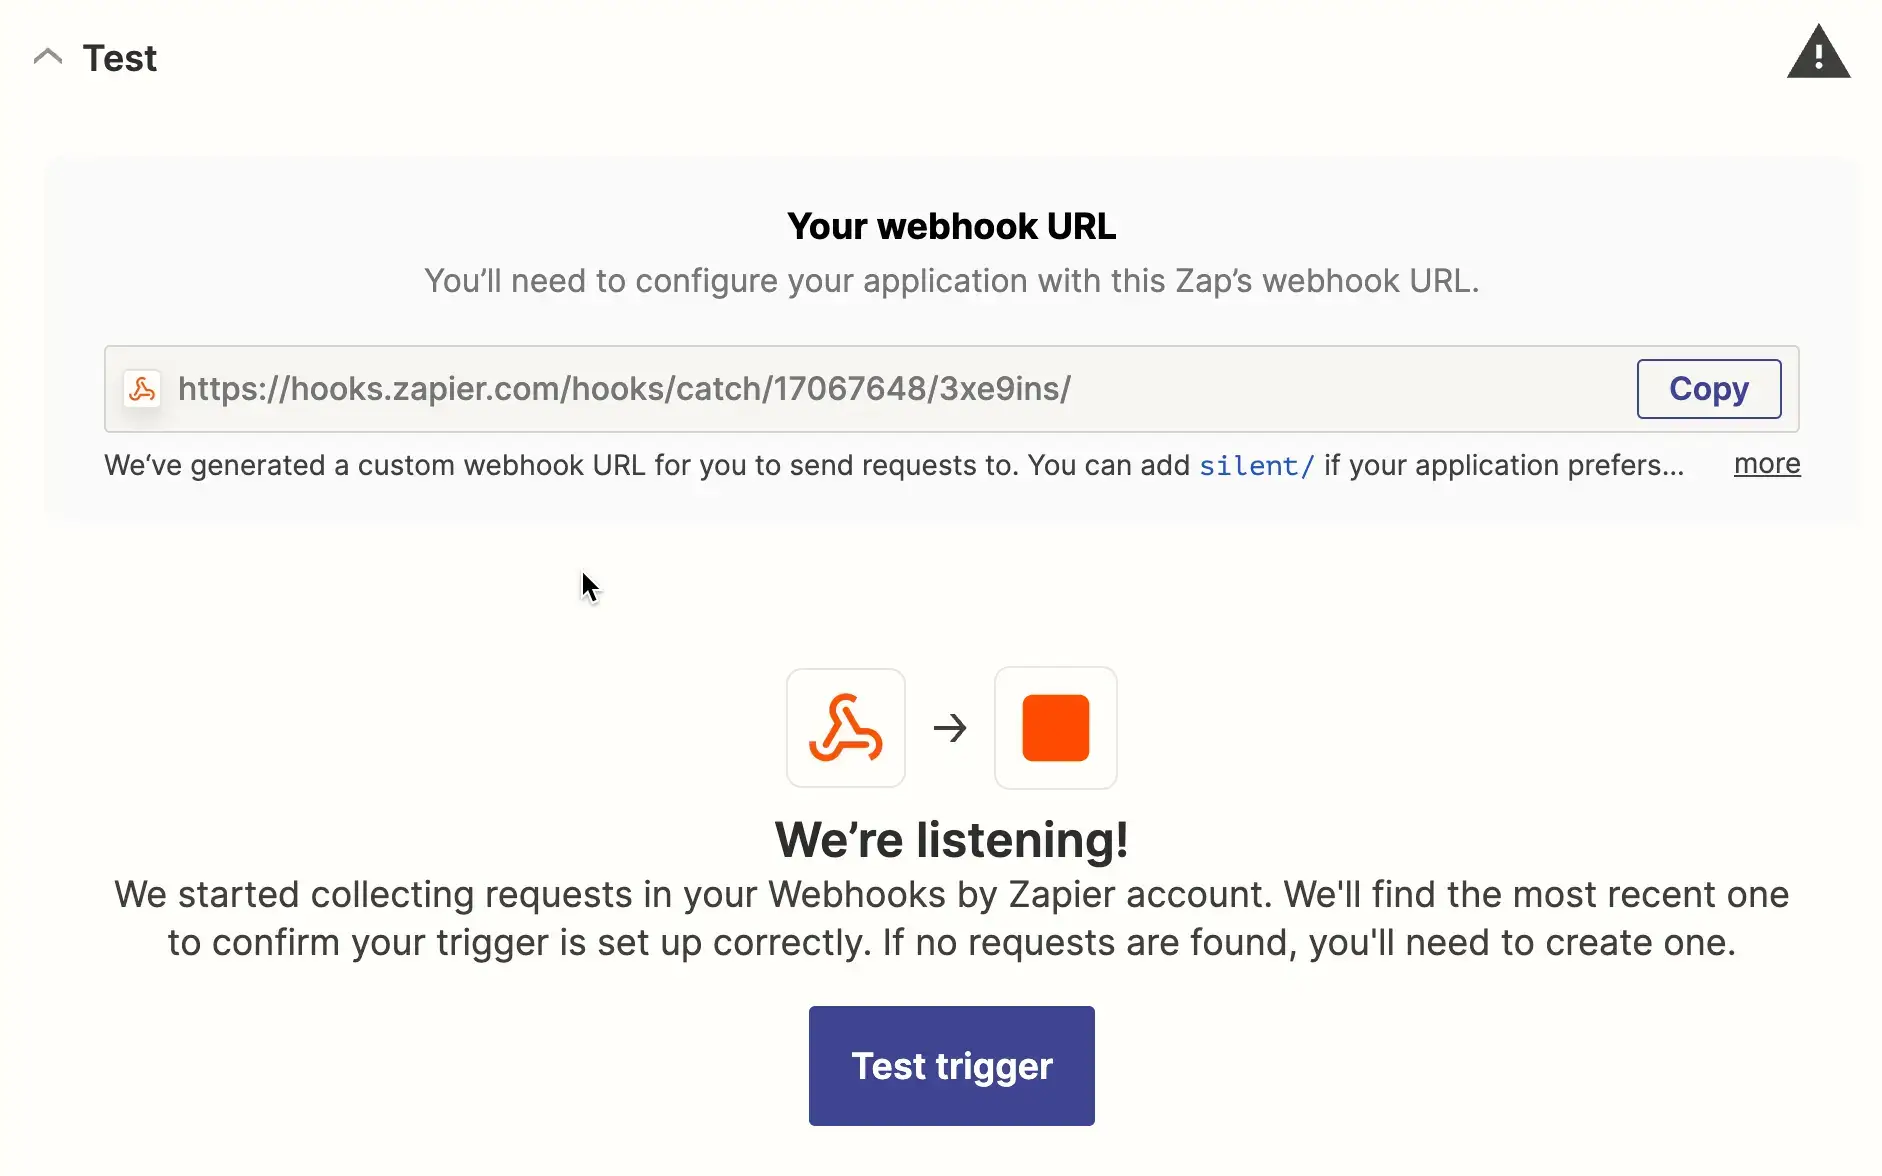
Create a new blank Zap.
On the trigger menu, select Webhooks by Zapier and configure it to catch the raw webhook.
You will be provided a webhook URL which you will need to replace with the one from Step 3 in the Kinde Setup.
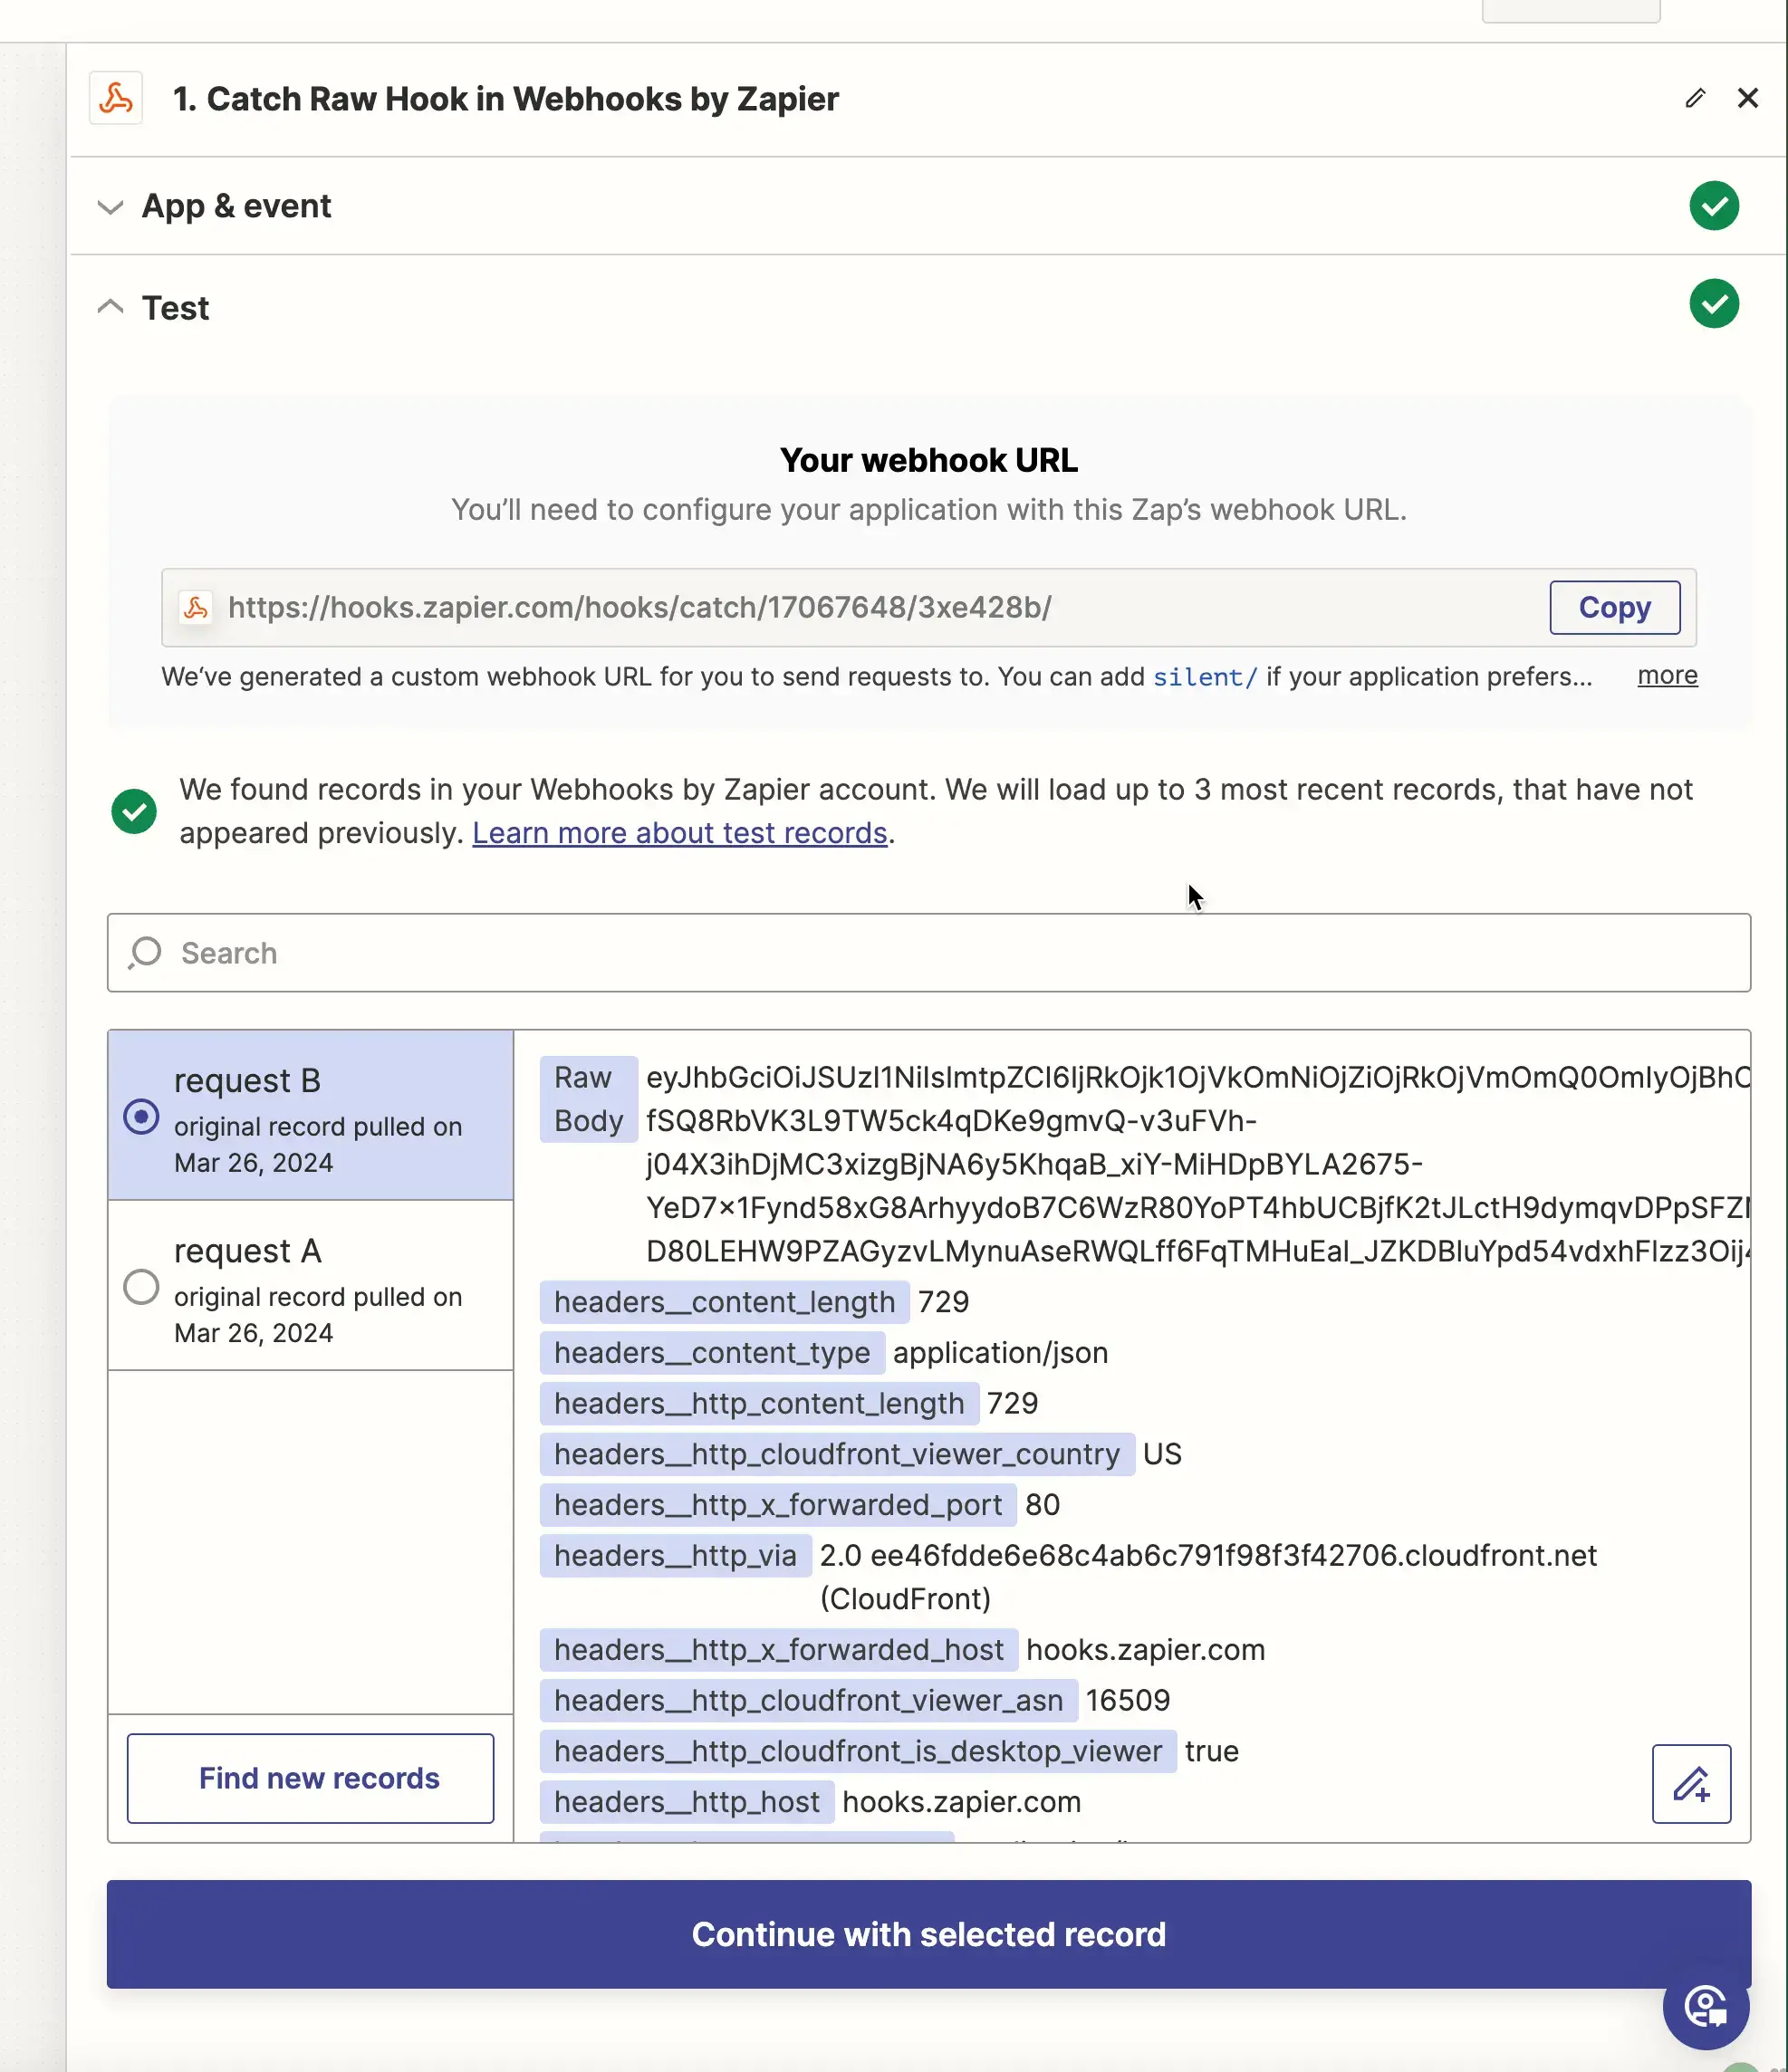
Perform an event that you are listening to. In my case, I will sign-in my authenticated application. After the event, press Test trigger.
Select the event from the menu. Notice the Raw Body containing the JWT.
Select Continue with selected record.
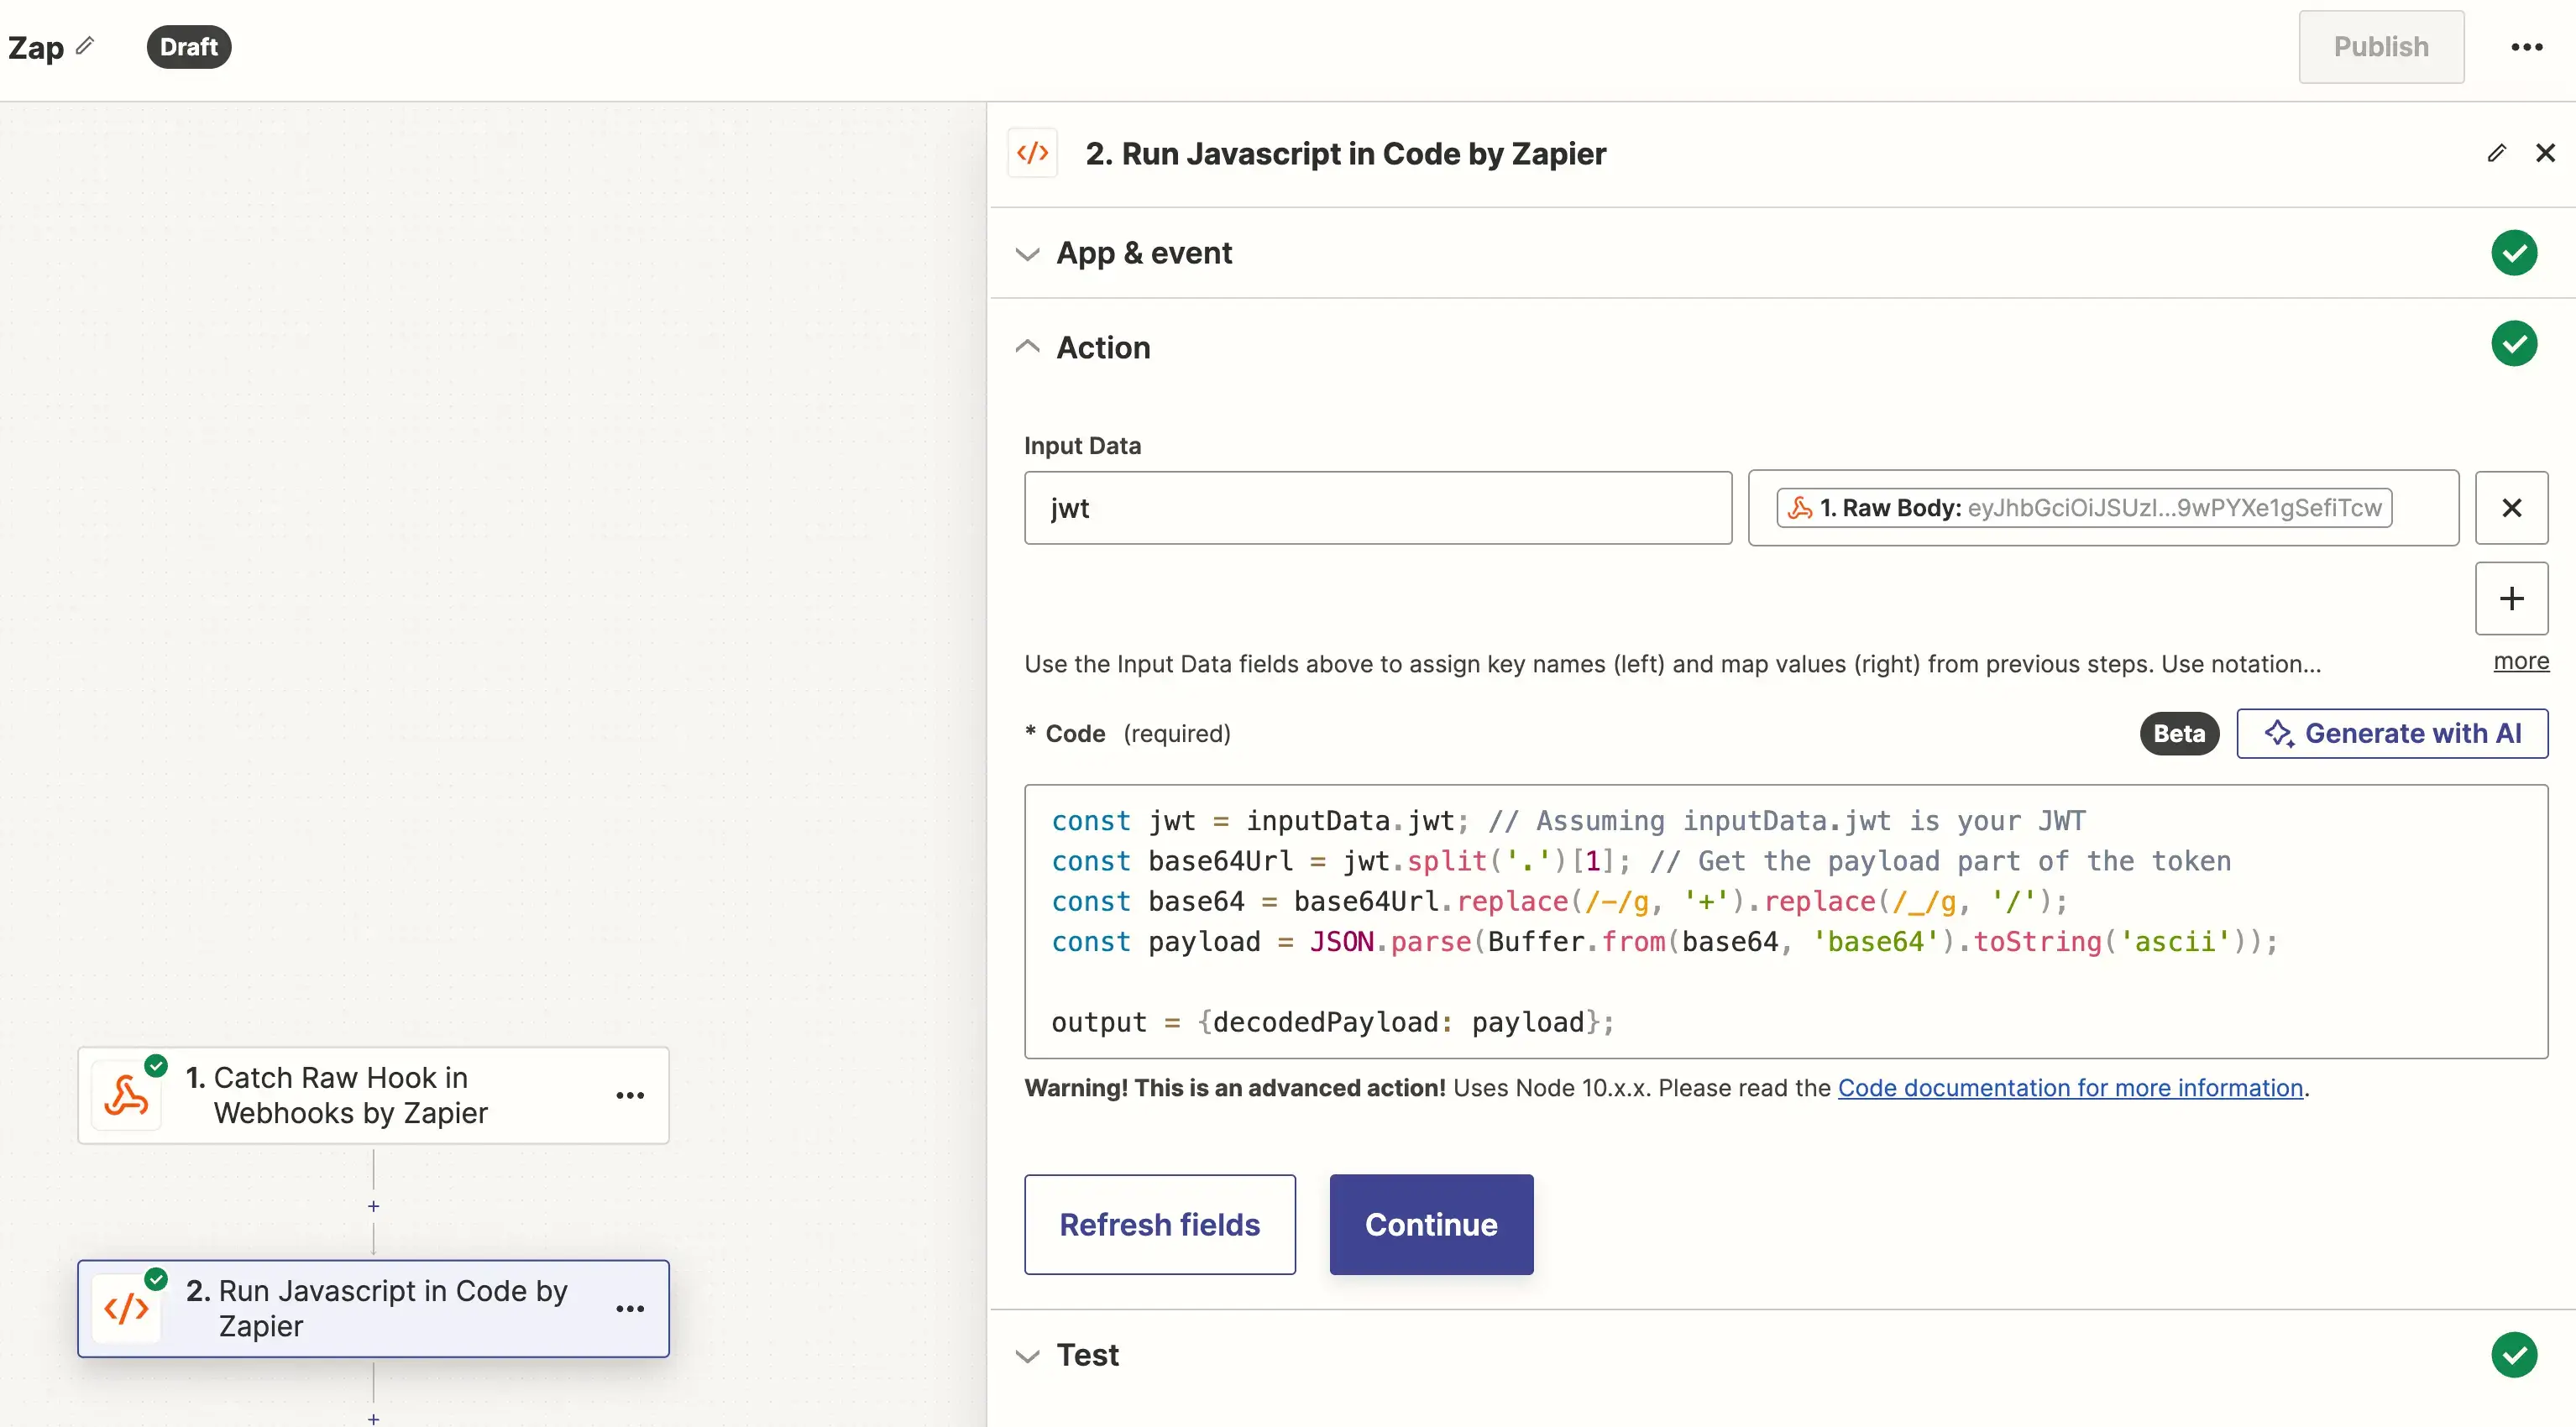
Add another action called Run JavaScript in Code by Zapier.
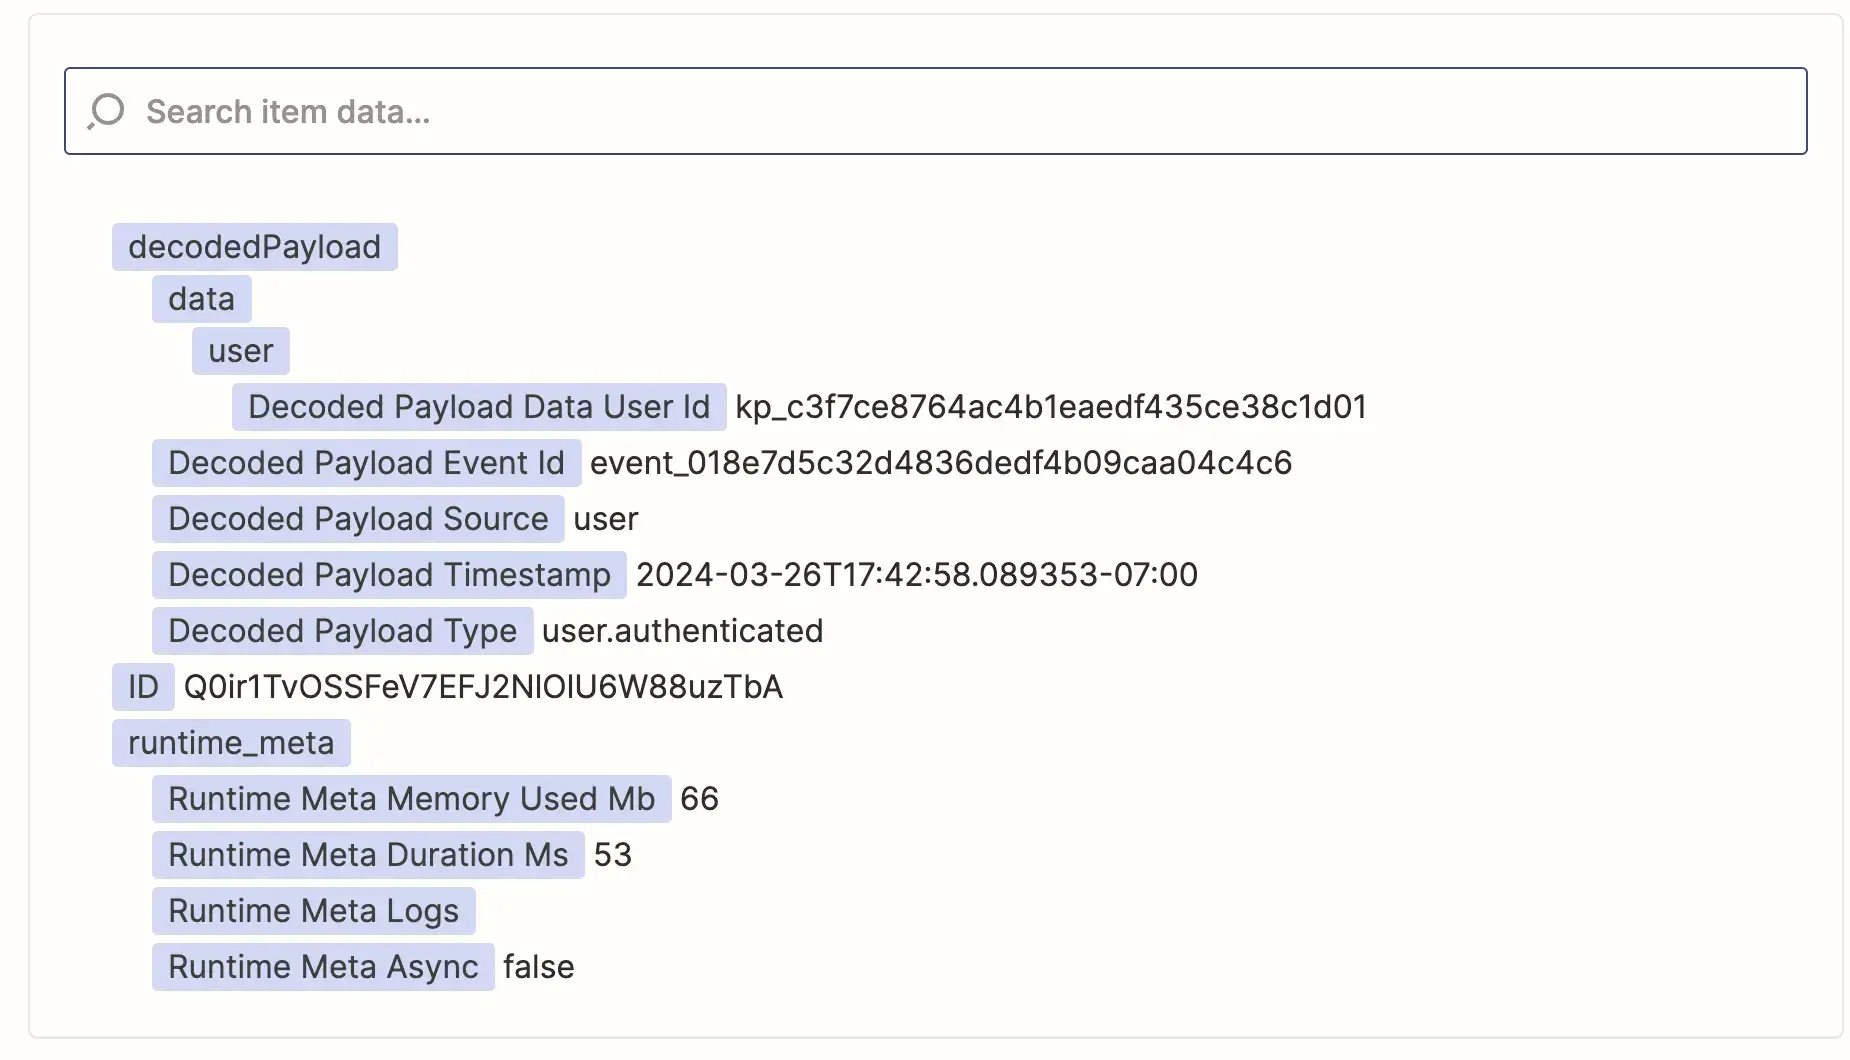
We need to write some code to parse the contents of that body. We already wrote this code initially in Step 3 for the Kinde Setup, so we can just copy and paste it into the code request.
const jwt = inputData.jwt;// Assuming inputData.jwt is your JWTconst base64Url = jwt.split(".")[1];// Get the payload part of the tokenconst base64 = base64Url.replace(/-/g,"+").replace(/_/g,"/");const payload =JSON.parse(Buffer.from(base64,"base64").toString("ascii"));
output ={decodedPayload: payload};
In the input field, make sure to assign the variable “jwt” to the Raw Body response from the webhook. which you can elect from the dropdown. The end result should look like this:
We can test it, and the response should look familiar:
⚠️ For cases where this information is strictly confidential or vital, you should utilize the incorporation of your public jws key to verify the signatures that they are indeed being sent by the correct person. Otherwise you could be susceptible to an attack of some kind. Your public key can be found at https://<YOUR_DOMAIN>.kinde.com/.well-known/jwks
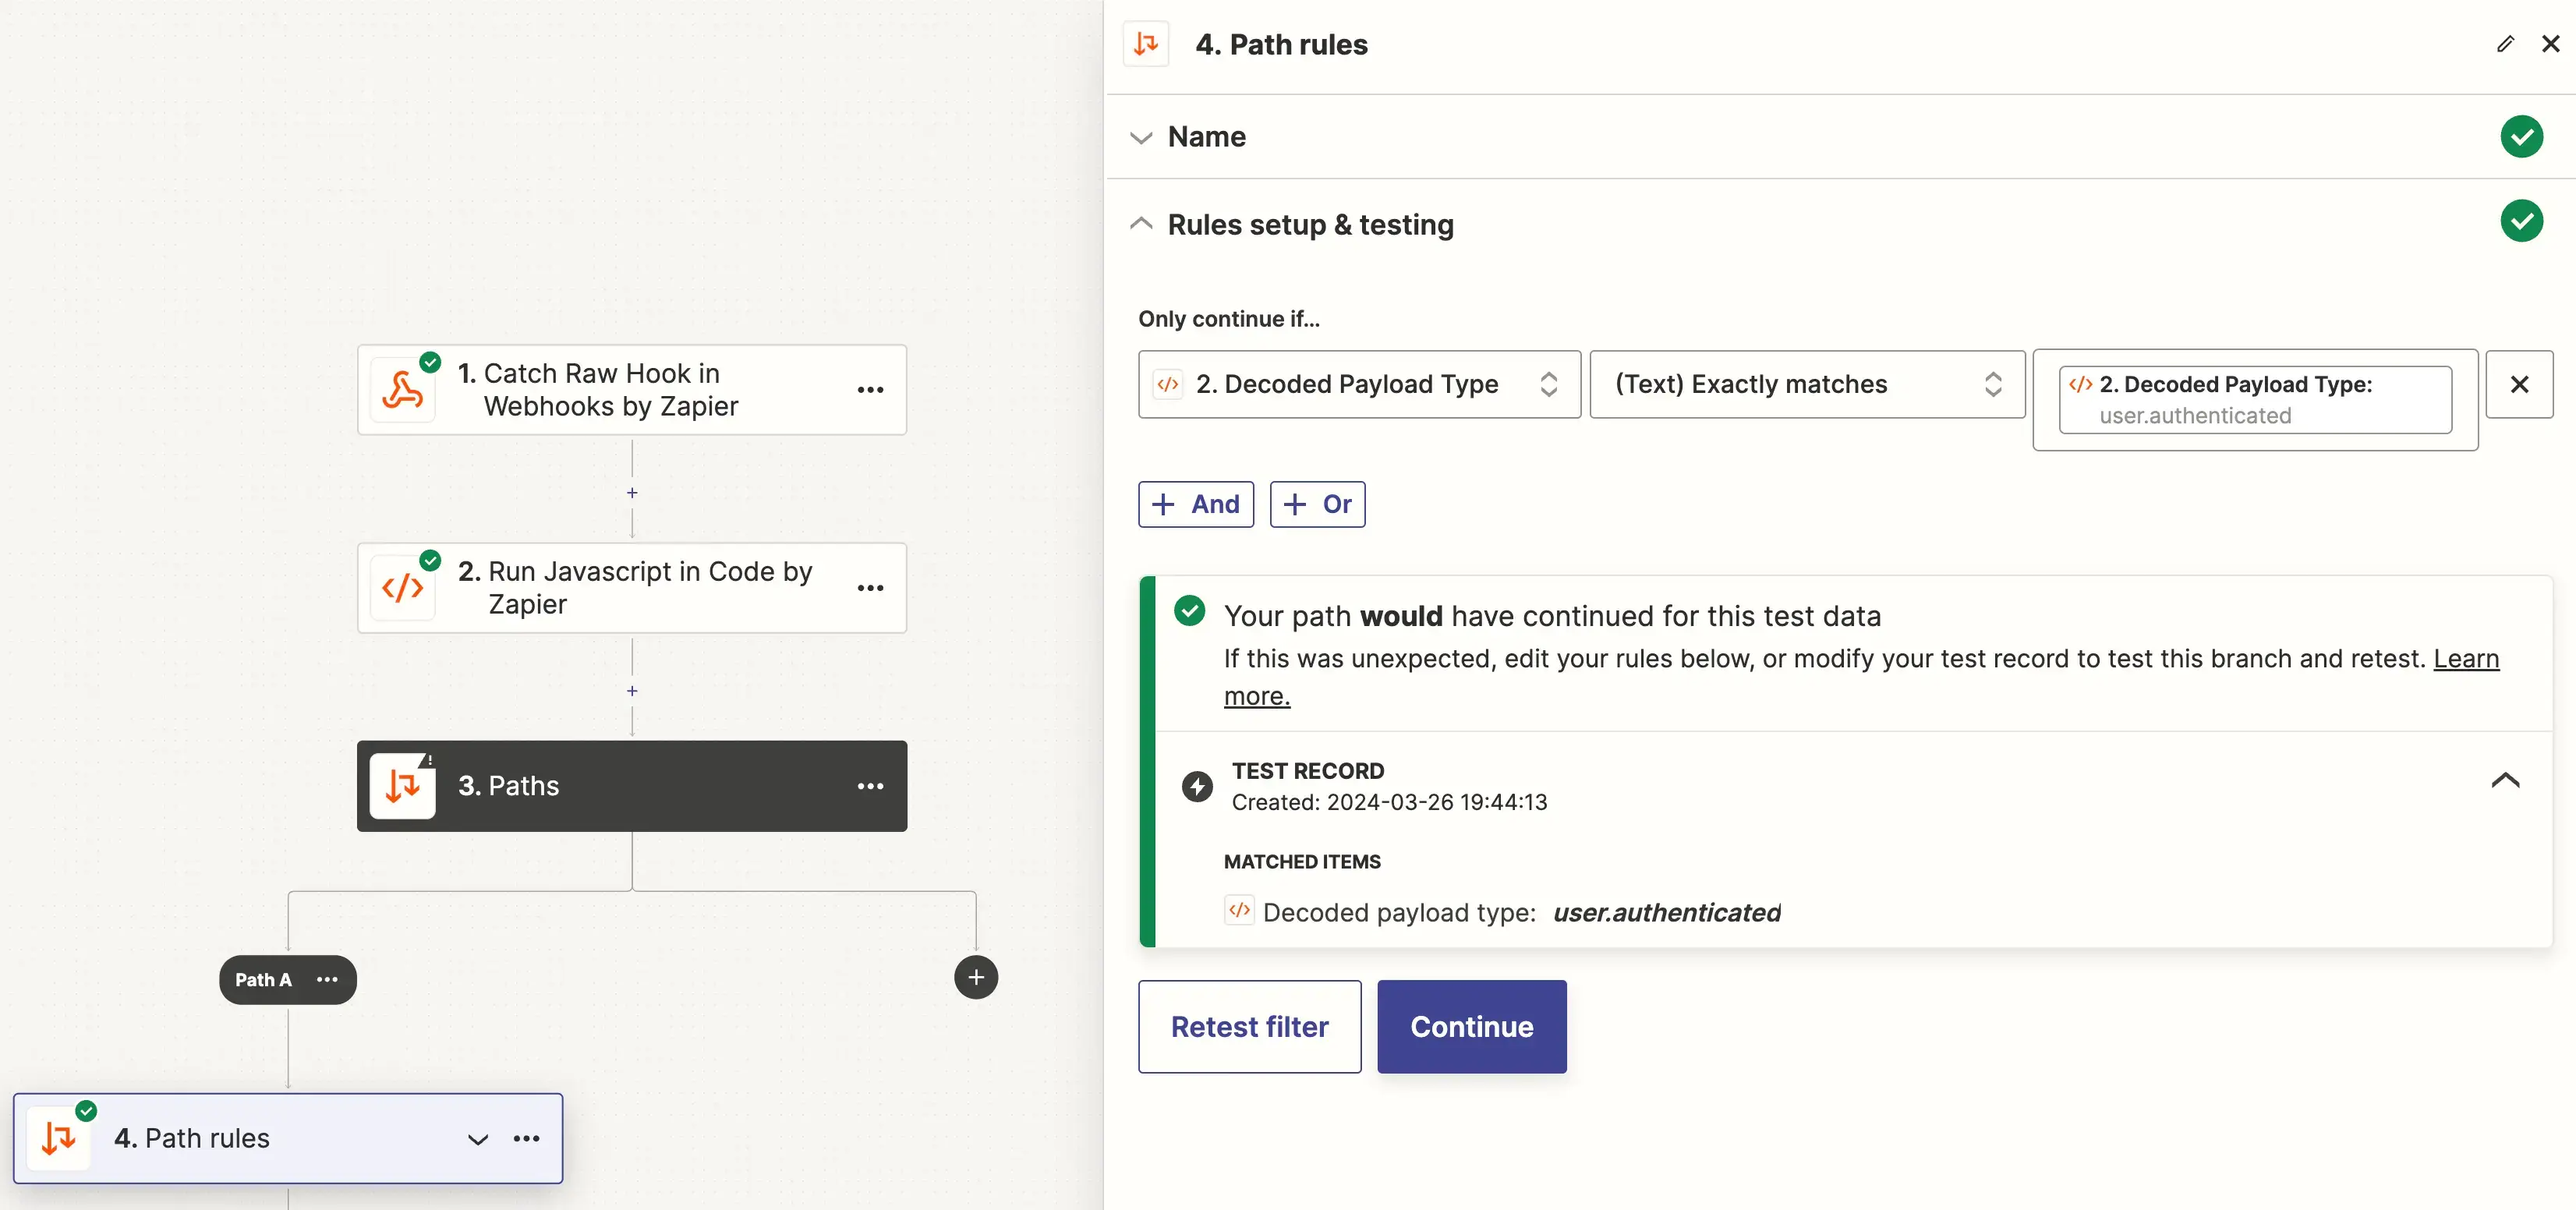
Add a path rule which aligns with the event handling that you want. For simplicity, I set mine to match exactly with the output of what I’m looking for: “user.authenticated”
Add the trigger that you want to happen. I’ll add a simple Discord integration that Sends a Channel Message in Discord whenever my event matches what we have constructed above with the text “Congrats! Another user authenticated!”.
And there you have it! We constructed a full flow that utilizes Zapier as the webhook processing agent. Now when a user authenticates in our App, we will get a Discord message in the server of our choice of the action with our custom message:
This is all fully customizable and can be set to be as unique or as complicated as you wish.
Stay in the loop!
Hear from us about product updates, news and cool things in the startup ecosystem.